- Commissioning
- Connect devices
- Webasto Next
Webasto Next
This page describes how to connect a Webasto Next charging station to the SOLARWATT Manager.
Table of contents
Compatibility
| EnergyManager pro | SOLARWATT Manager (flex 1.0 / flex 1.5 / rail) | Firmware | |
|---|---|---|---|
| Webasto Live |
|
| |
| Webasto Next |
|
| > 3.0.8.4 |
| Full compatibility |
| No compatibility |
Possible number of controlled charging stations in the energy management system
| EnergyManager pro | SOLARWATT Manager (flex 1.0 / flex 1.5 / rail) | |
|---|---|---|
| Keba | 1 | 3 |
| Webasto (Live/Next) | 1 | 1 |
| Alfen | 1 | 3 |
Installation and configuration
Interfaces: Ethernet, WiFi
Applicable documents
Prerequisites
- Webasto firmware > 3.0.8.4
- Webasto Next was connected to the network before switching on
- Expert view of the user interface
Webasto Next configuration
- Call up the Webasto user interface in a browser
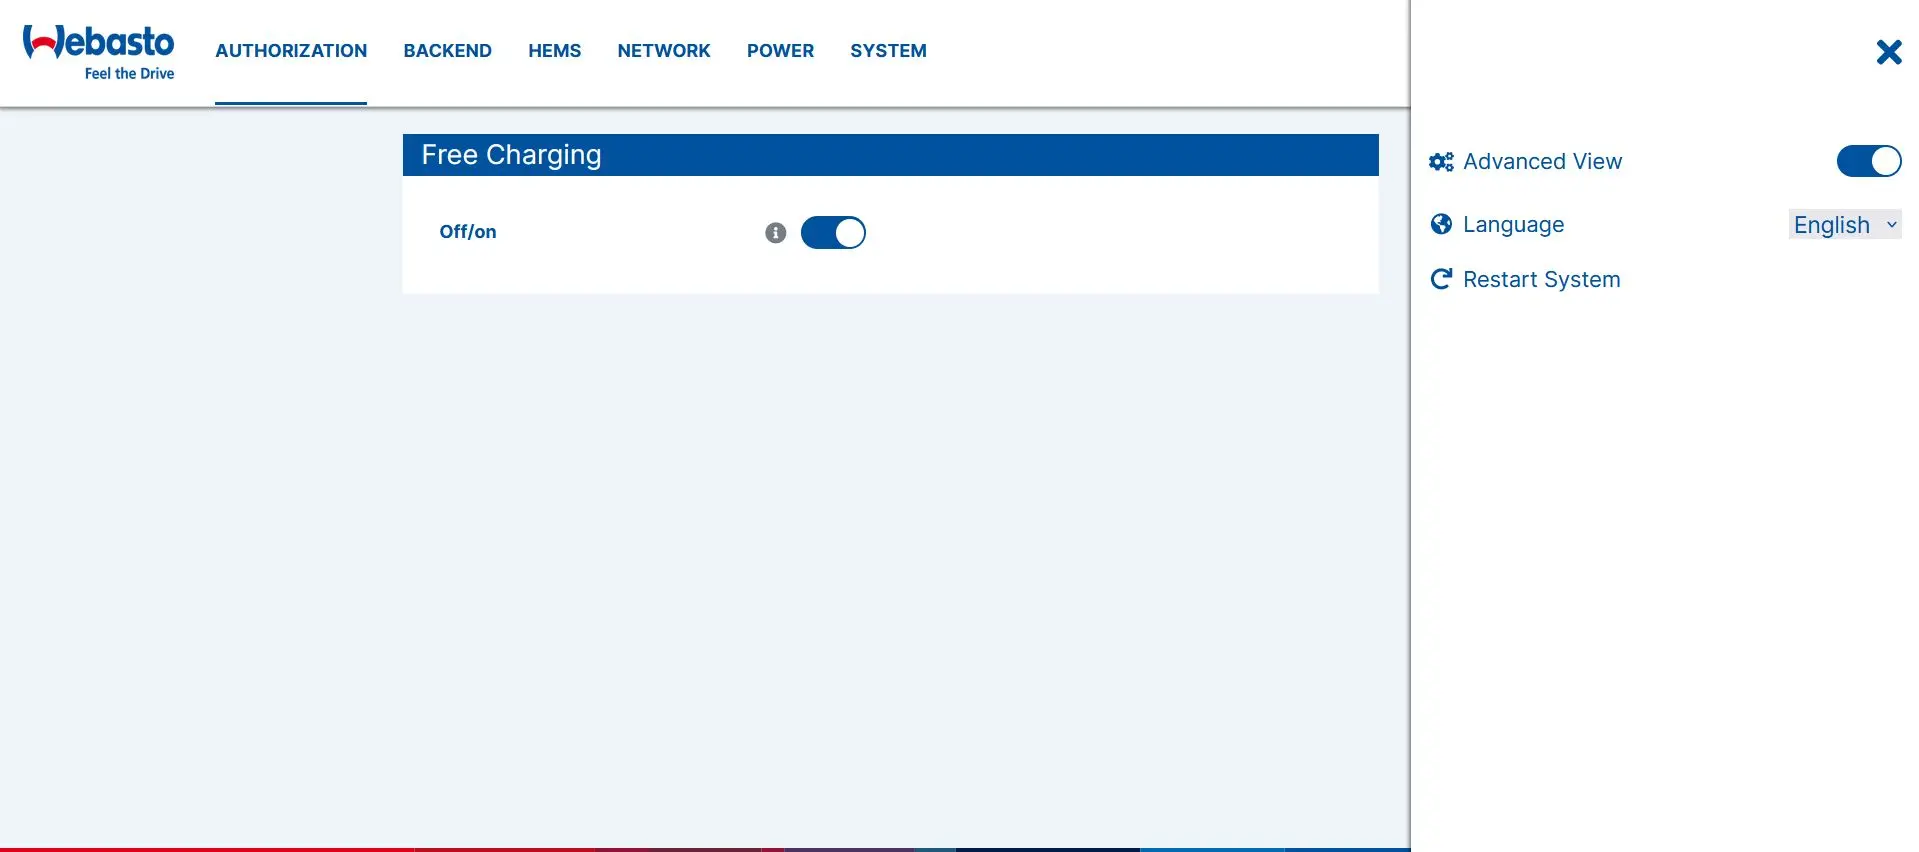
- Call up the profile settings by clicking on the user abbreviation (in the screenshot AD in the top right-hand corner of the screen)
- Activate the expert view
- Under Authorization Free Charging, set to on
- Backend menu: Set connection type (Connection type) No Backend
- confirm with Battery

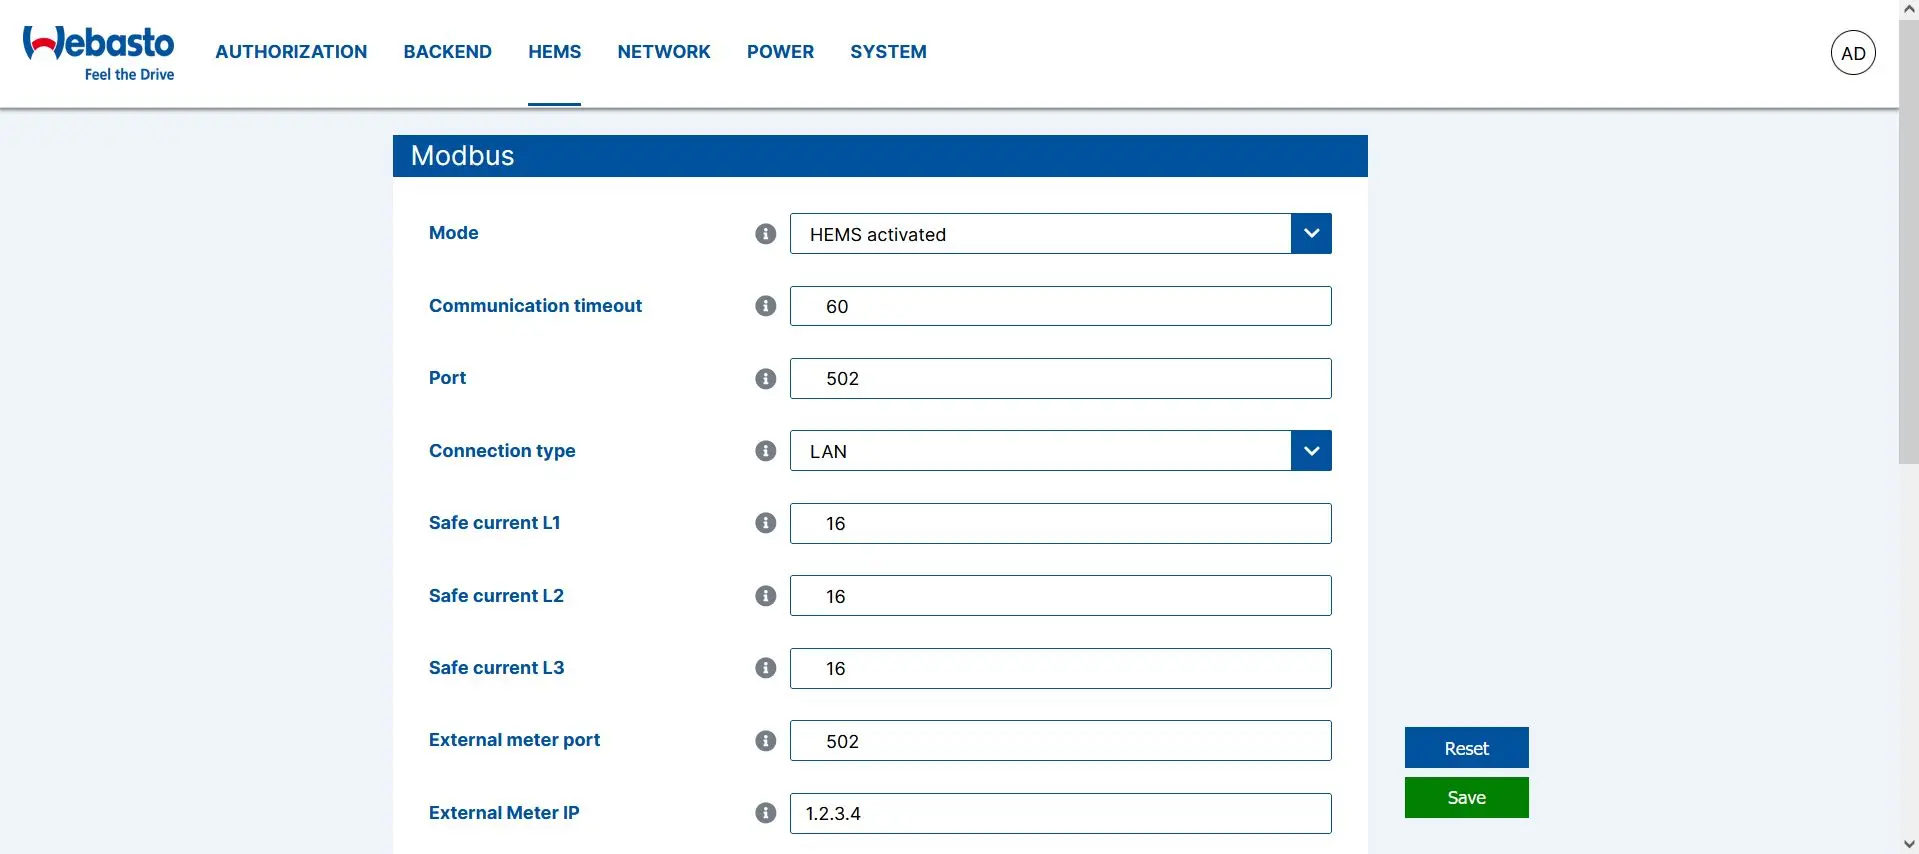
- HEMS menu: Set up communication via Modbus TCP
Settings:
- Mode: HEMS activated
- Port: 502
- Connection type: LAN
- Set the fallback values for the charging current (Safe current L1, L2, L3, charging currents if the connection between Manager flex and Webasto Next is lost)
- confirm with Save
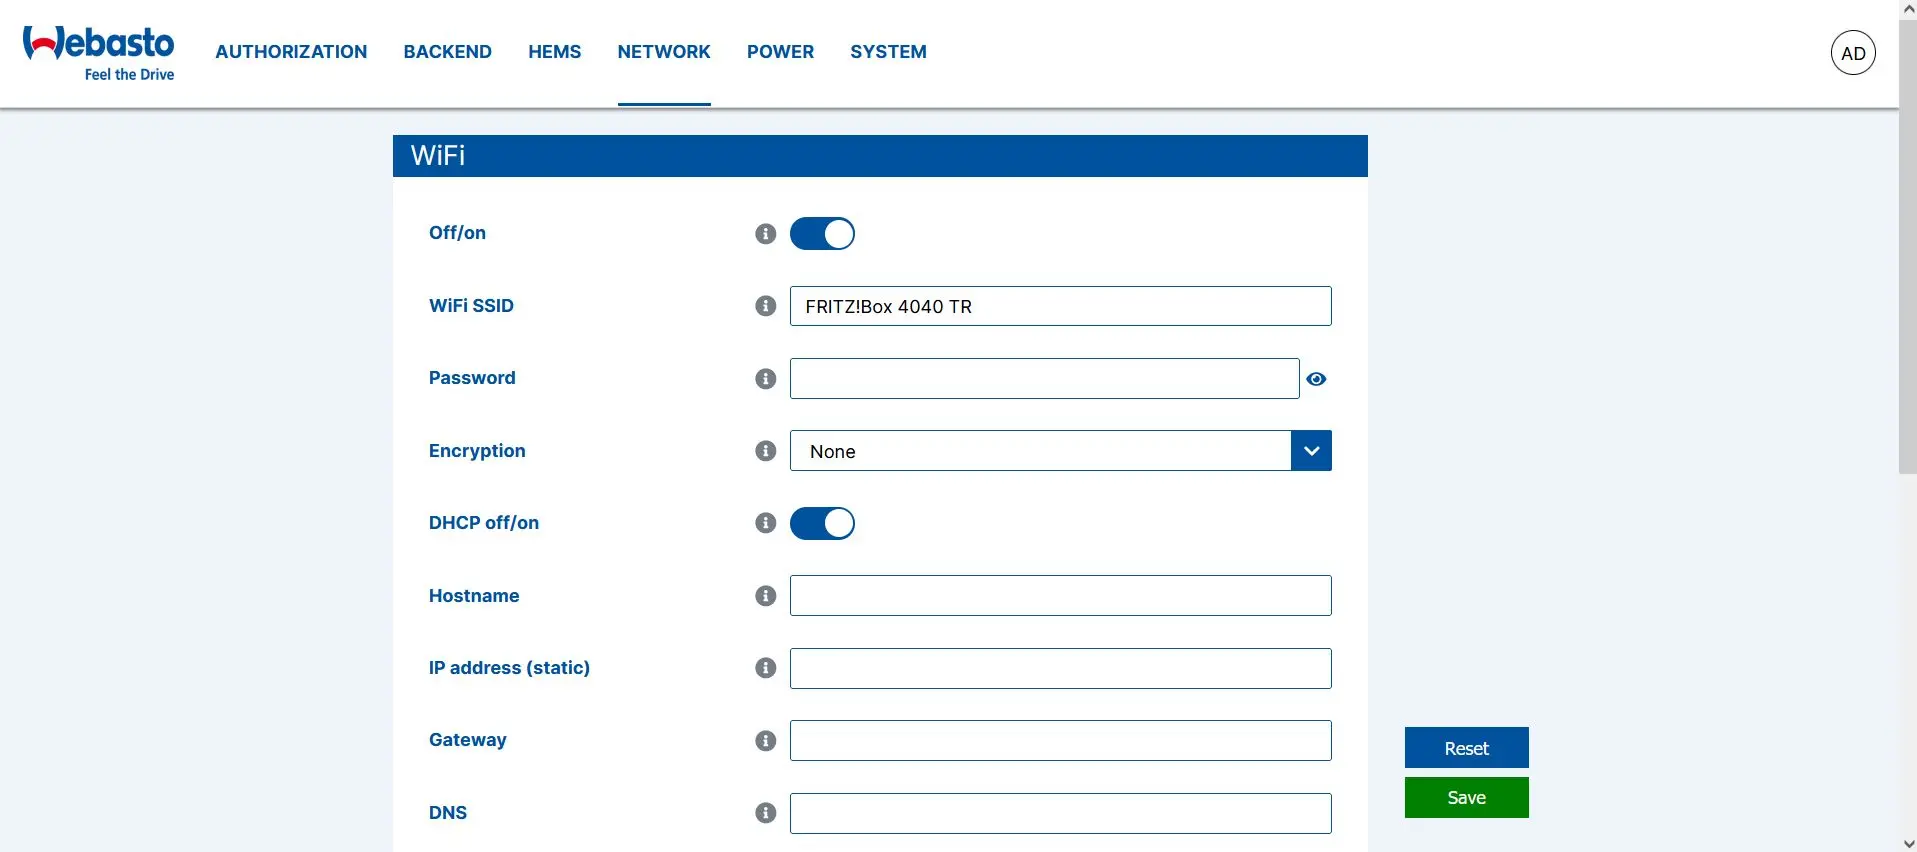
- Network menu: Integration into the local network (via WiFi or LAN)
Integration via WiFi
- Activate WiFi (DHCP Off/ on)
- Enter WiFi network name (WiFi SSID) and password
- Activate DHCP
- confirm with Battery
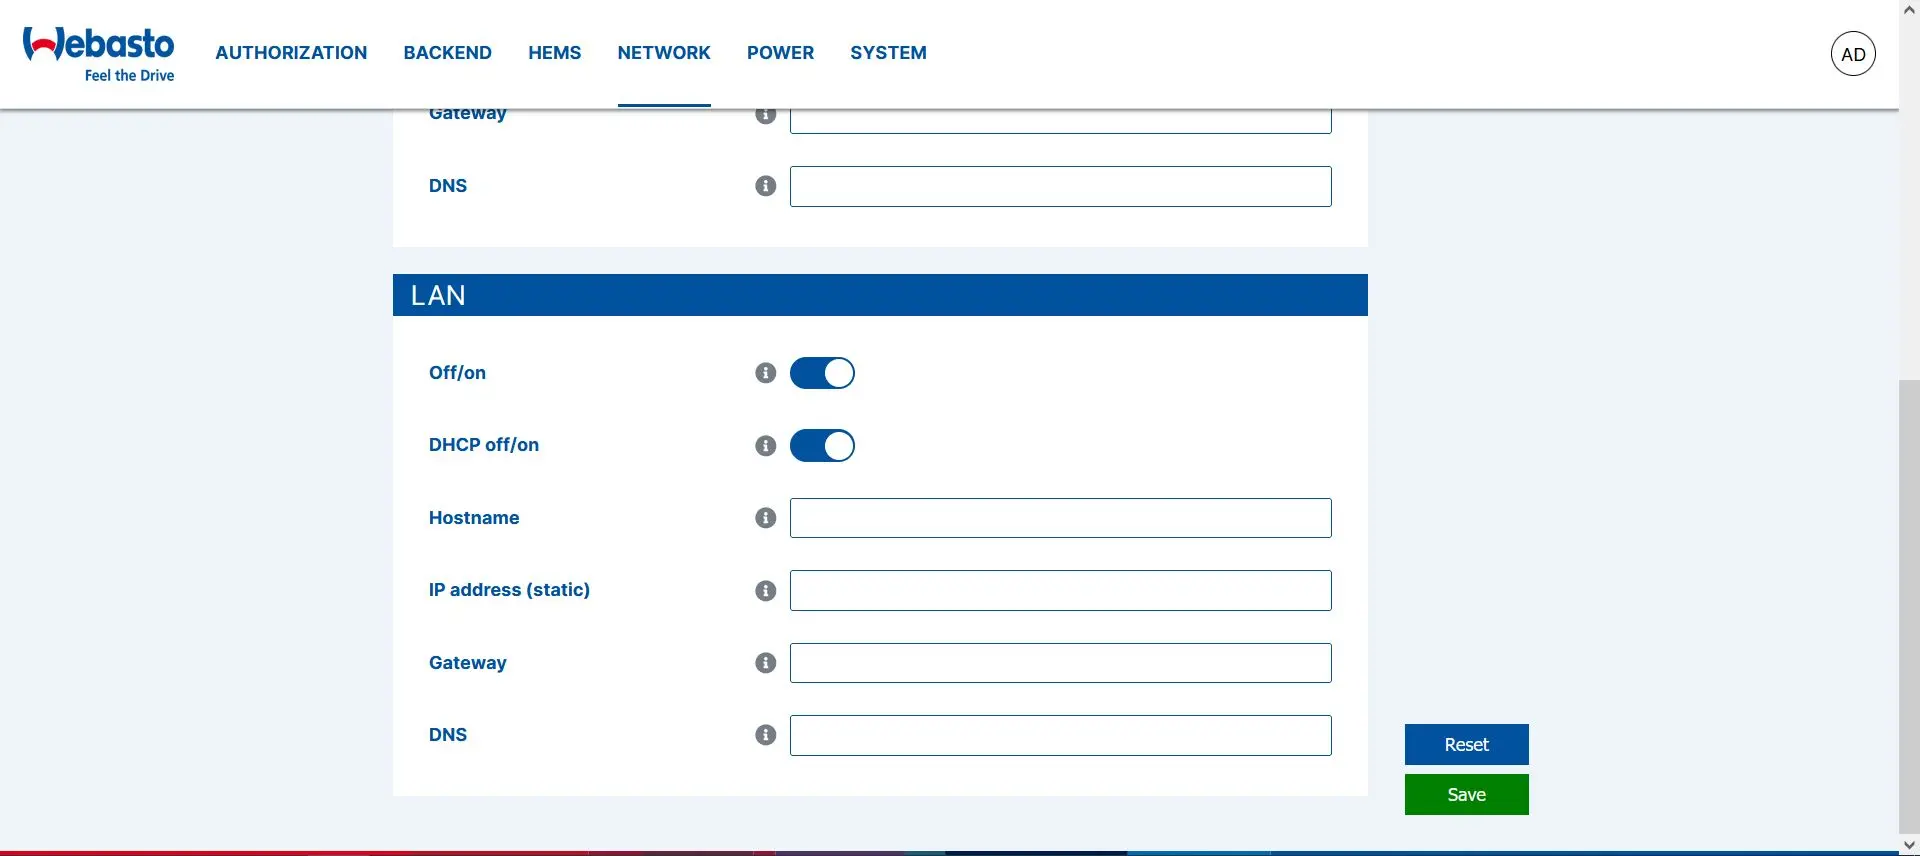
Integration via LAN
- Activate LAN
- Activate DHCP
- confirm with Battery
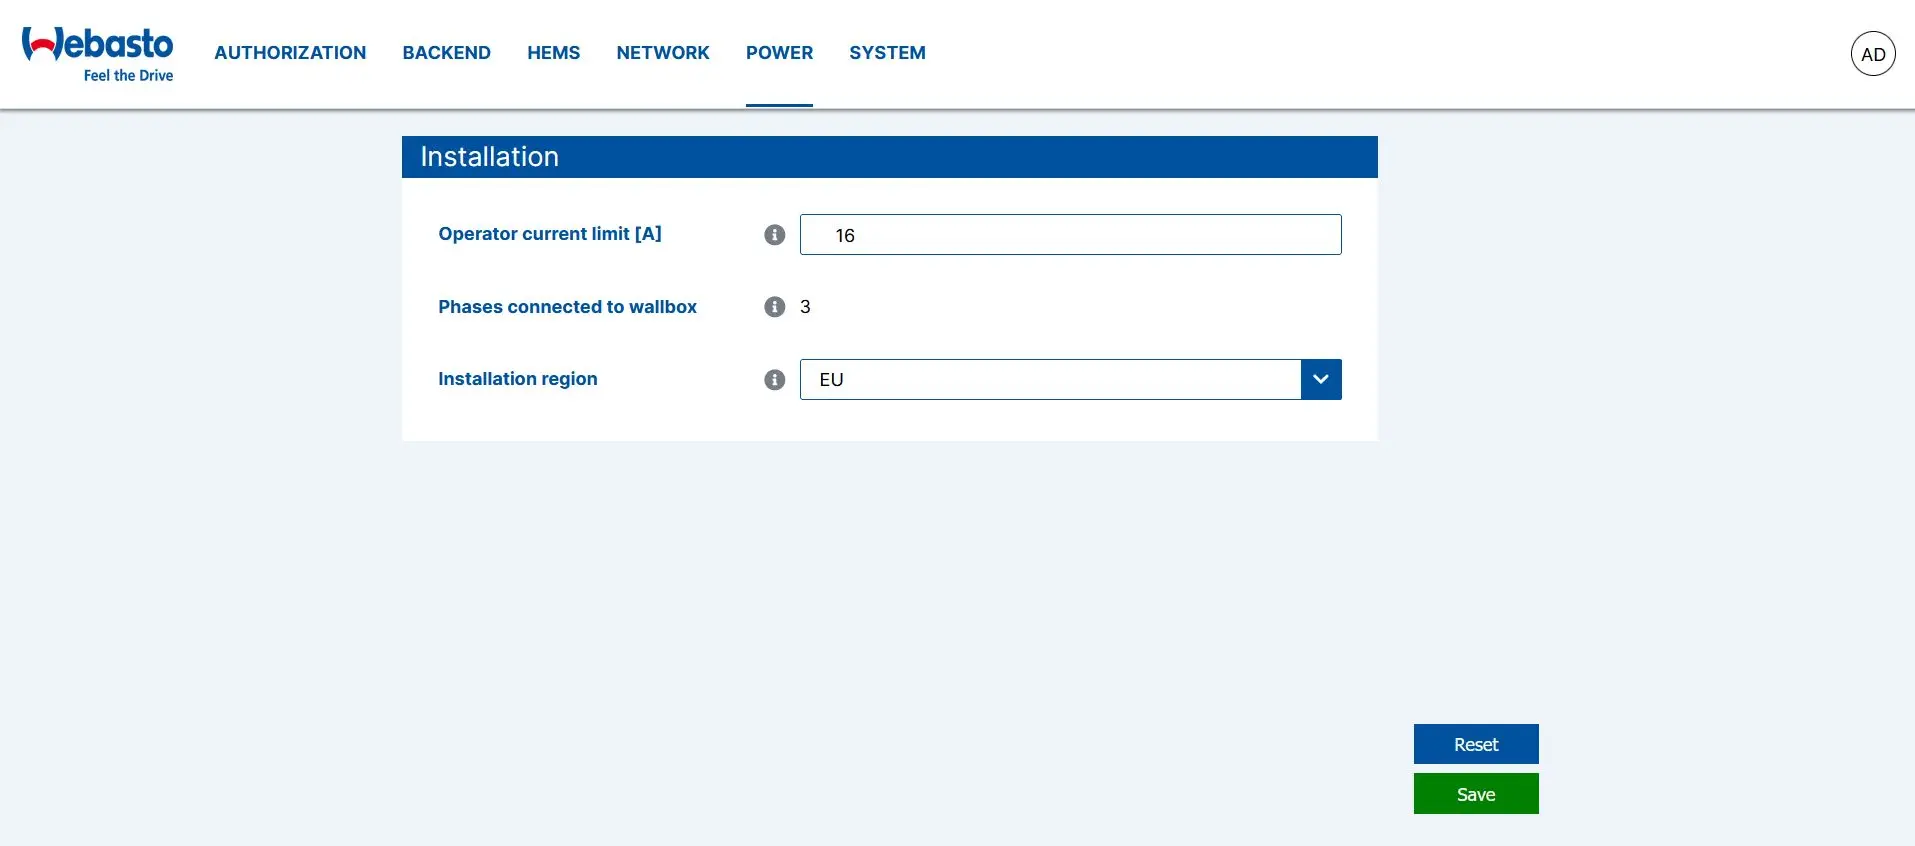
- Menu Power: Set the maximum permissible charging current
- Charging current (Operator current limit): maximum permissible value limited by fuse protection of the house distribution board
- Specify the number of connected phases (Phases connected to wallbox)
- Specify country settings (Installation region)
- confirm with Battery
Device search in SmartSetup
Certain device types are found and installed automatically(Automatic installation)
Other device types must be installed by selecting the device driver and specifying the IP address or host name(manual installation).
Information on the installation types can be found in the table below.
Automatic installation
If the device is correctly configured and available in the network, it is displayed in green in the device list.
- If necessary, connect additional devices
- Continue with SmartSetup PV systems
Manual installation
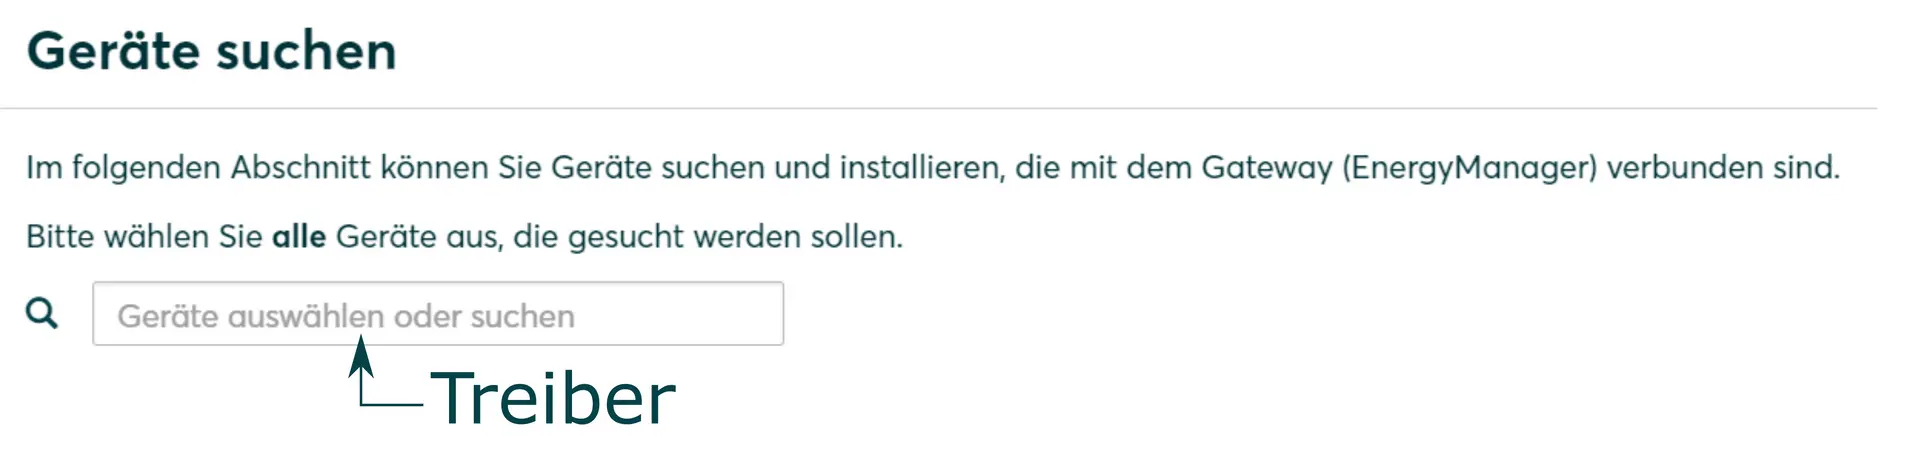
- Select Select devices in the drop-down menu or search for the corresponding entry according to the table below.
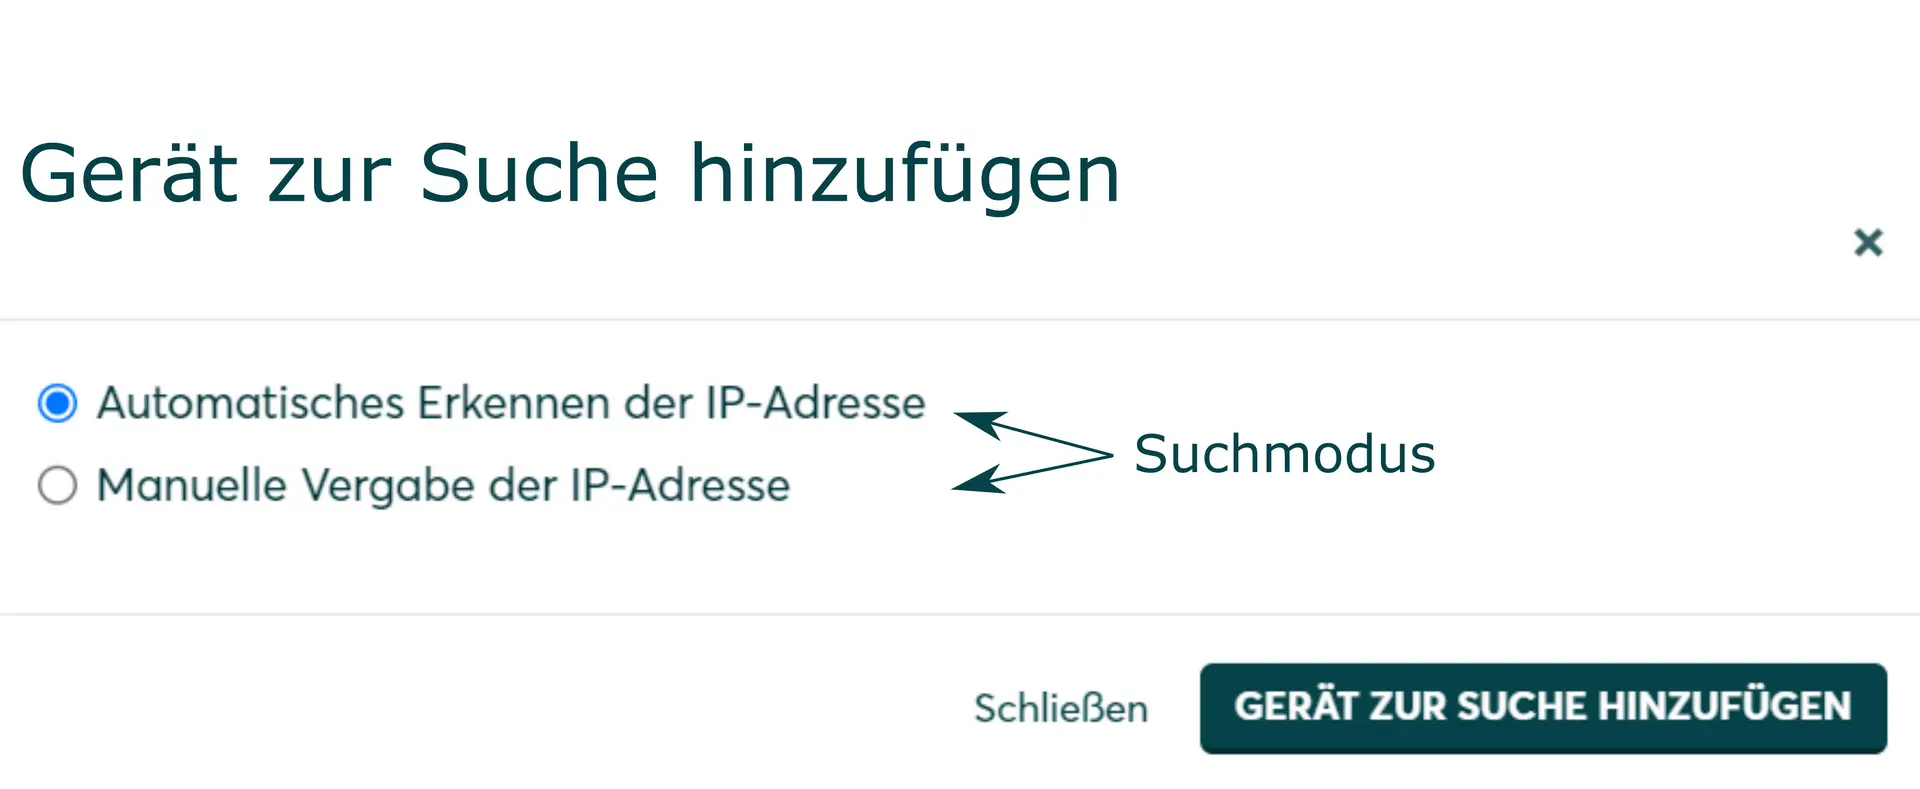
- Enter the required specifications according to the table below:
- Search mode
- iP address or host name, if applicable
- Click Add device to search.
- If necessary, add further devices to the search.
- Once you have added all the devices to be searched for, click Search for and install devices.
You can recognize correctly installed devices by the message: Device is installed. in the device list. The list also shows the current creation data.
- If necessary, connect additional devices.
- Continue with SmartSetup PV systems.
Driver selection for device search
| energyManager pro | SOLARWATT Manager (flex 1.0 / flex 1.5 / rail) | ||||
|---|---|---|---|---|---|
| Driver | Search mode | ||||
| Webasto Next | Device not supported | Webasto Live/Next charging station | Serial number: can be viewed on the Webasto user interface (System menu) Host name or IP address: can be viewed via the router user interface Connected phases: see installation plan | ||
Troubleshooting
If the device is not found via the automatic search / automatic IP detection, check whether the device is available in the local network (via network scan - note, a network scan requires the prior consent of your customer - or access to the local user interface of the router).
If necessary, restart the devices.
PV optimization settings
Additional settings are required to operate the device with a maximum proportion of solar power (PV optimization).
The settings for PV optimization are made in the SOLARWATT Manager portal under Optimizer.
Selected articles: